
Hello! Looks like the entire blogoshpere is on going on a vacation. Hmm, so what are your plans for your holidays? I am heading out to Pondicherry for a mini vacation this weekend. I thought a handmade Xmas card would be a great idea and asked Asha, my favorite craft blogger to do it. I am a great fan of Asha’s crafty ideas at Hastkala. She readily agreed to do a Xmas card and gift box tutorial for our readers. Of course, this idea need not be limited to Xmas, you can use this fabulous idea just about for any occasion. Now, over to Asha….
————————————————————————————————-
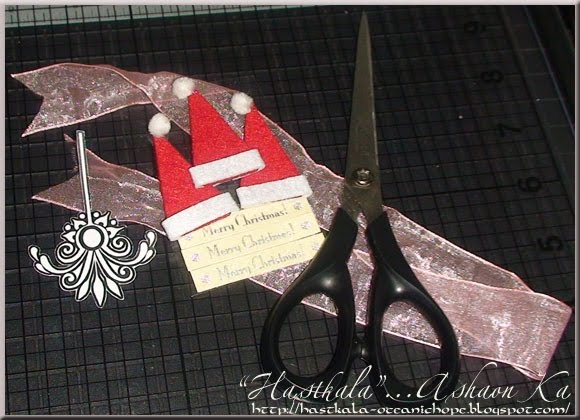
Hello Everyone!!! Happy Celebrations to you ALL!!!! It is Asha here for you with a tutorial to make a Simple Christmas Card with an Easy Treat Box to go with……
First let’s get down to making the CARD….

Supplies you will need are:
• Cardstock (CS) in 3 Colors (I used Kraft, Turquoise & Baby pink)
• Design Paper (DP) for the front (I used Stampin’ UP! Design paper)
• Scissor
• Scale for measurements (I use a Paper Cutter too)
• Good strong adhesive (I Used tape runner)
• Embellishments like a image of your choice, ribbon & Sentiments (I used a digi ornament, light pink ribbon from stash & sentiment Merry Christmas bought from Hobby Ideas)
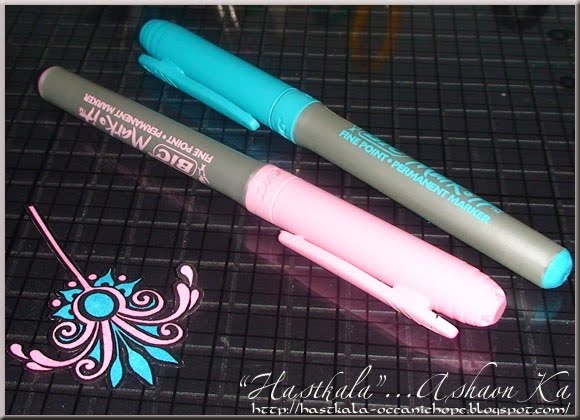
• Coloring method of your choice (I Used Bic Markers)
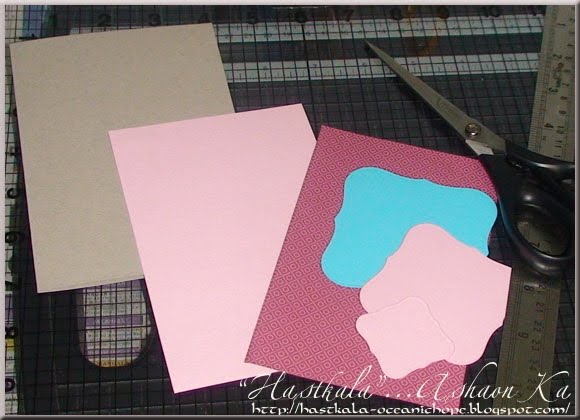
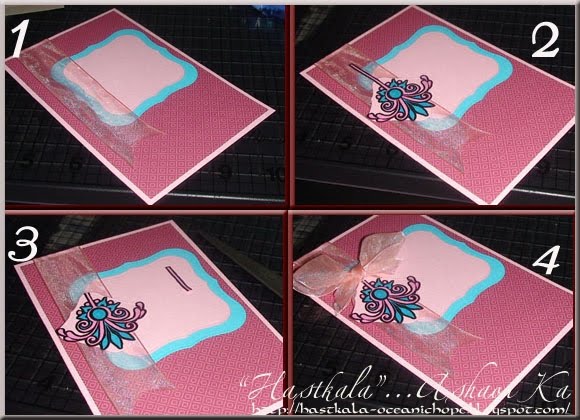
Cut your CSs into desired shapes & Sizes…. I made Kraft the base of my card & blue & pink CSs for the layers……The base of my CS is 8×6 (8 inches for breadth & 6 inches for length)… So I score (To mark with lines or notches) the CS at 4 inches & fold it to make the base of the card which is now 4 inches breadth x 6 inches length….
I then cut the layering CS (baby pink) a quarter inch lesser than the base… (3.45 x 5.45). I cut the DP another quarter inch lesser to layer it on the pink CS….. I trimmed the blue & Pink CSs to some shapes using my Cuttlebug to cut with the spellbinder die cuts…. You can just use your scissor to trim them to some nice & clean patterns…..
Now my basic supplies for layering are all ready….
Next, color the image that you want on the card… Here I colored the digi ornament that I printed & hand cut with a scissor….. I colored them with matching blue & pink to go with the CSs chosen for my card….
Now we have all our basic stuffs ready…. So let us now put them all together to make it look like a Greeting Card…. 😉

Put the Kraft color CS which is for the base aside…. Let us work on the rest & then go on it finally…. 🙂
• First adhere the DP onto the pink CS
• Second adhere the patterned shapes that u have cut
• Third adhere the image onto a small shaped CS for matting
• Fourth adhere the patterned shapes onto the pink CS
• Fifth adhere a piece of ribbon for embellishing a side…. (You can work on it however u want to…. I am just following a sketch basically, which is from Mojo Monday shown above in B&W)
• Sixth adhere the image on the ribbon
• Seventh, U can just let the stem of the ornament be… I foolishly & blindly chopped it off… Oops!
• Eighth, make a small ribbon bow & adhere it on top of the ornament, like the ribbon holds the ornament….
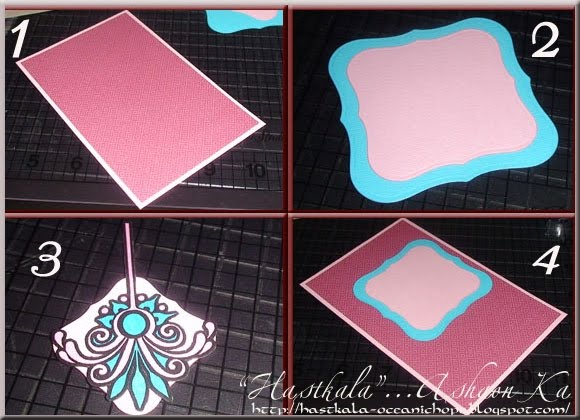
Now that your basic layer is all ready, you can just adhere it onto the card base… which is your Kraft CS….
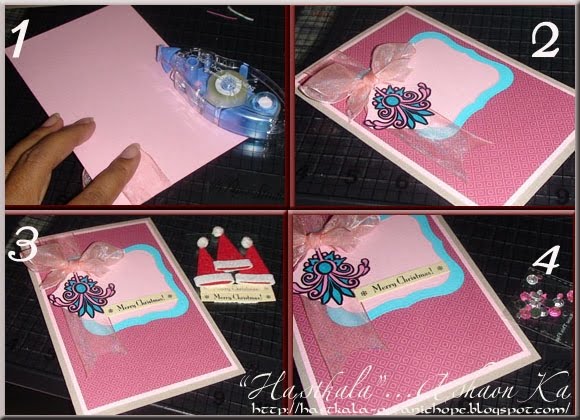
Now your basic card is ready…. To embellish it with a sentiment, either u can use a hand written one or just stamp or just use any printed sentiment like I did….. To complete it I adhere a few rhinestones in pink & white…..
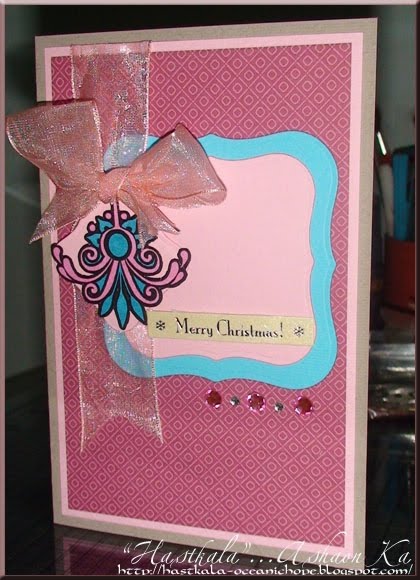
VOILA!!!! It is done…. Don’t you like it?
Now let us get onto the Second part of our learning…. A Matching TREATS BOX!
Supplies U Need:

• 2 pieces of CS in Baby Pink…. Both pieces of same measurement, depending on your preference….
• A Punch (I used snowflake punch from Itsy Bitsy)
• An adhesive
• Embellishment of your choice….
• Something to score the CS (I use a ball pen which does not write 😉 U got to be light but steady so as to not rip the paper off)
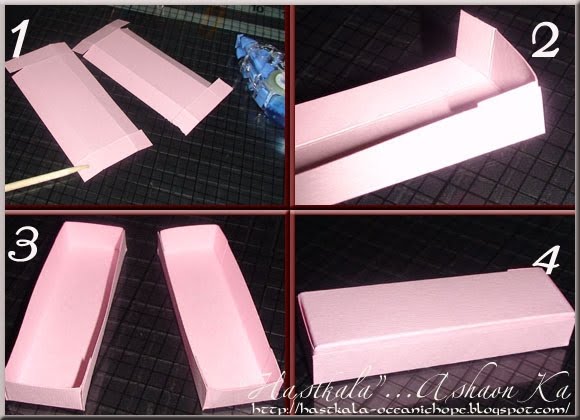
Two pieces of same sized CS… No particular measurements as such, but I have them in rectangular shapes….
I scored ½ inch at all four sides…. Scoring paper would help u get crisp & neat folds….
I then cut the scored line meeting the line lengthwise, at all four squares….. Now I fold them well to get perfect crisp folds at all scored lines….
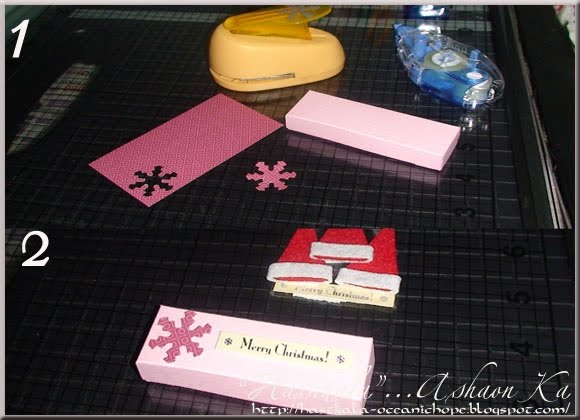
Now u have to apply adhesive on all four squared flaps….. (Space where the chopstick points in the first picture above) Once it has been glued at all four sides, paste them as shown in the second picture…. You have to paste the flaps inwards…. Repeat with both to get 2 well folded & glued boxes….
I just punched out a snowflake from the DP I used on the card…. & adhered the Merry Christmas sentiment on it…. I wanted it to go totally with the card, hence kept it simple & neat…. U can decorate your card & box, according to your likings & heart’s content…. 😉
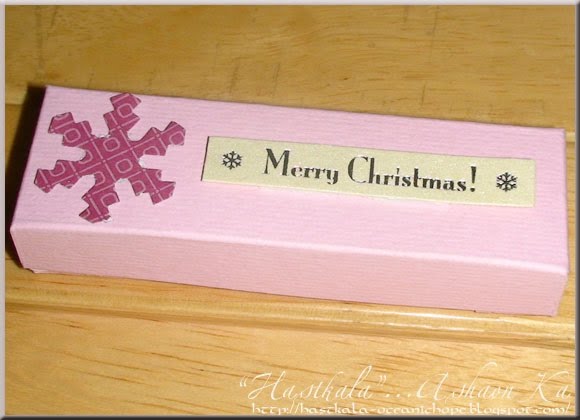
With both the pieces of the same measurements, try combinations to cover the box…. Usually one would turn out to be smaller & would easily be covered by the other box…. And here is your Treat Box!!!! Now that it is ready just go ahead & embellish it….
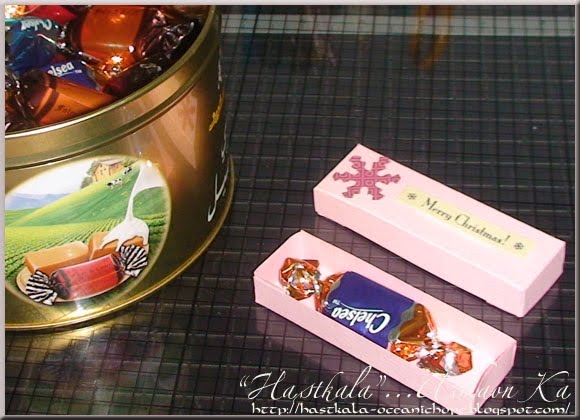
I just wanted it to hold a single toffee, as I made it for a friend who was on diet…. I did not want to add up calories to her diet, but still wanted to exchange a small Christmas treat with her….
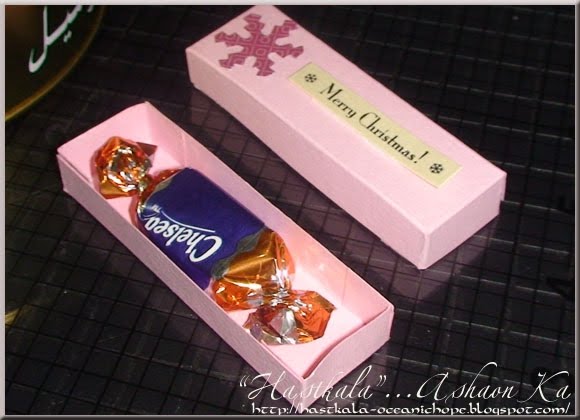
So you can get this easy peasy box ready within no seconds, according to your preferences…. BIG or SMALL…. 🙂
I tried making this tutorial as easy as possible…. Any issues with it anywhere, kindly write to me about it to [email protected] & I would try to help you further…. I really hope you would find this helpful to make your own simple goodies this Christmas!!!! Happy Celebrations!!!!!!
————————————————————————————————–
That was a lovely tutorial, wasn’t it? Thanks Asha, you did this tutorial in spite of being sick just in time. My heartfelt appreciation for all your efforts 🙂 . I am linking this post to our Xmas Carnival as usual. Have you sent in your entries to the Carnival, if you haven’t please do, we’d love to have you join in the year end celebrations. Happy holidays!
Head to our Pinterest board to pin these images!


this is exactly what I needed. was thinking of how to put the truffle in the gift boxes…this will make it easier. thanks a ton. the card is lovely too.
Thank You Rekha… U r being kind & generous, to me…. Hugs))))
Happy Celebrations!!!
Ash…
(http://hastkala-oceanichope.blogspot.com/)
The card is beautiful. Thanks for the detailed tutorial. I will try doing the card… Hope it turns out as good as yours 🙂
Its a beautiful tutorial and a cute DIY 🙂 I remember making cards for my teachers and friends when in school. Hand made ones double the joy of the ones receiving it too ….
Merry Christmas and Happy Holidays !
Satrupa,
http://satrupa-foodforthought.blogspot.com
Hey this is a really cool tutorial..thanks for sharing
loved the tutorial.. thank you!