
I cannot stay away from beautiful old furniture. The kind found in old homes and antique shops. When Sarmistha transformed just these kind of chairs by stenciling motifs on them, I thought, “Hey, that looks great!” And, coming from me that is something. You know why? Usually I hate to mess with the beauty of old furniture – the craftsmanship and elegance you find in those pieces is just not found today.
So without further ado, I will hand over my blog to Sarmistha Ghosh, who will show you a really simple way to enhance the beauty of old wooden chairs.
—————————————————————————
Hi! I am Sarmistha!
DIY is becoming a growing trend these days. It perhaps is the most satisfying and budget friendly way to decorate our homes. With Pinterest supplying us with a steady flow of mind boggling ideas, it is hard to resist too long till the DIY bug bites one… definitely true in my case.
I got hold of these two bare wooden chairs from a neighbor as she was about to discard them. I thought if they were polished and painted, they would look awesome! So I got them from her!
 |
| Start with plain old chairs like these. Sandpaper them first for a smooth finish. |
All that was required were some stains/paints and stencils. In my case, I had already decided on what to paint on them. You could brainstorm or use the stencils you have on hand, to do something similar, yet achieve a different look.
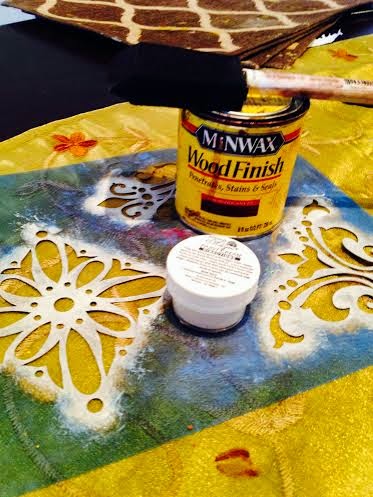 |
| This is all you need to get started! |
This is what you do
- Wipe the surface of the chairs clean.
- With the help of an applicator or even with a raggy cloth, stain the surface of the furniture to the desired color.
I used red mahogany stain – just one coat. - Let it dry well. preferably over night.
- Next stencil it or hand paint it. I used white stencil paint. If it’s not available then simple acrylic paint will do.
- Let it all dry really well
- Your chairs are ready!
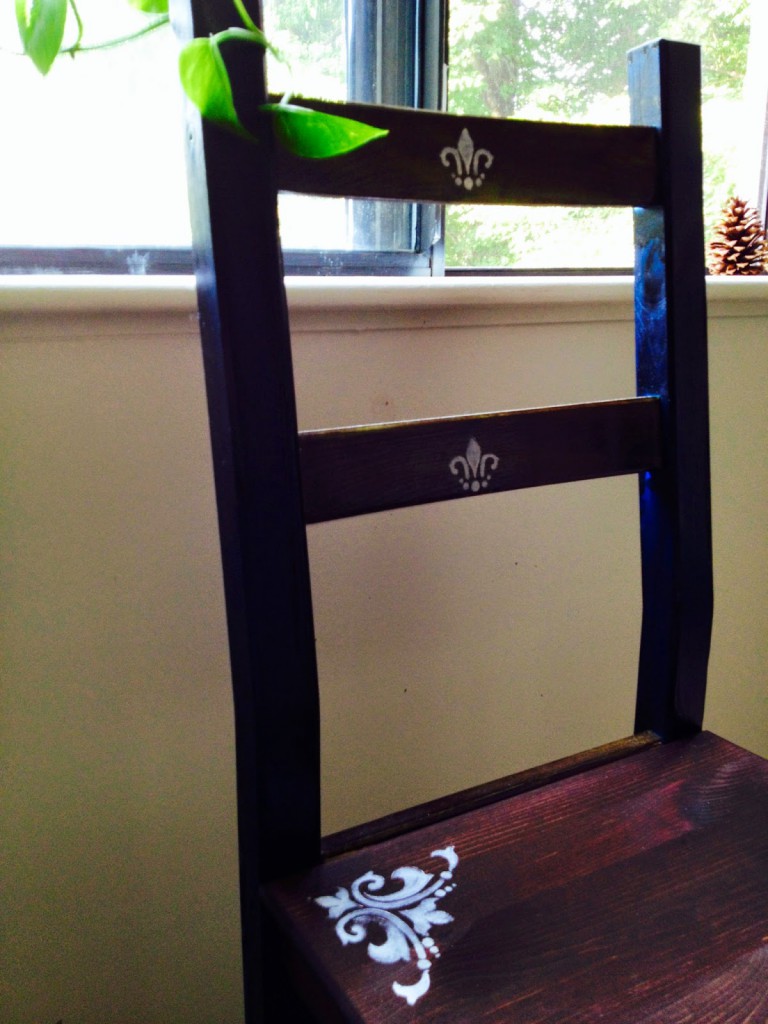 |
| A close-up of the stenciled details |
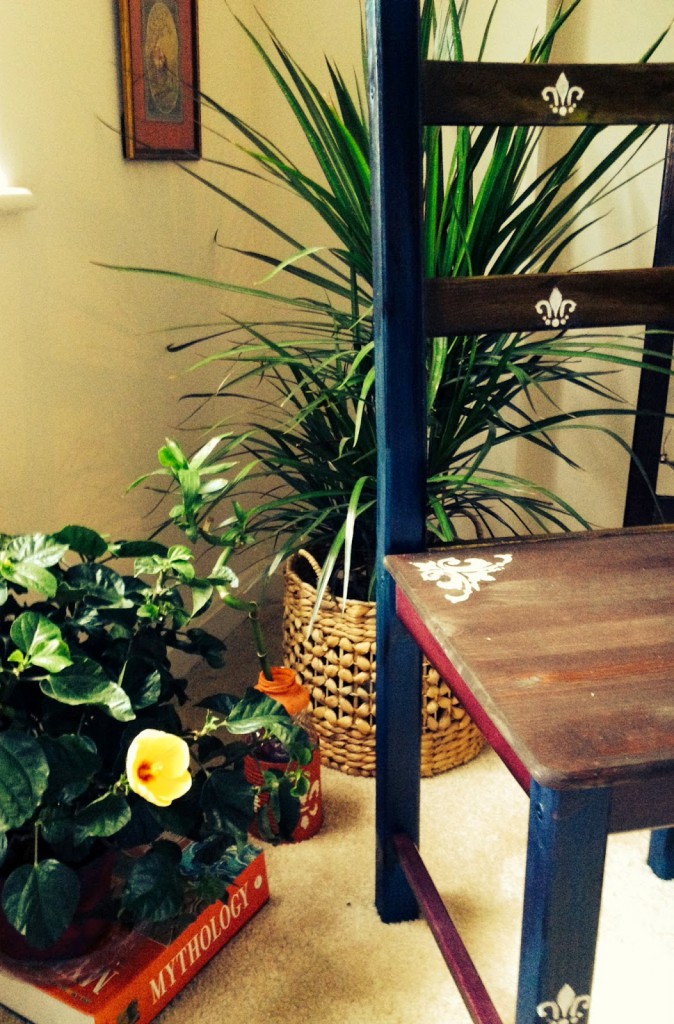
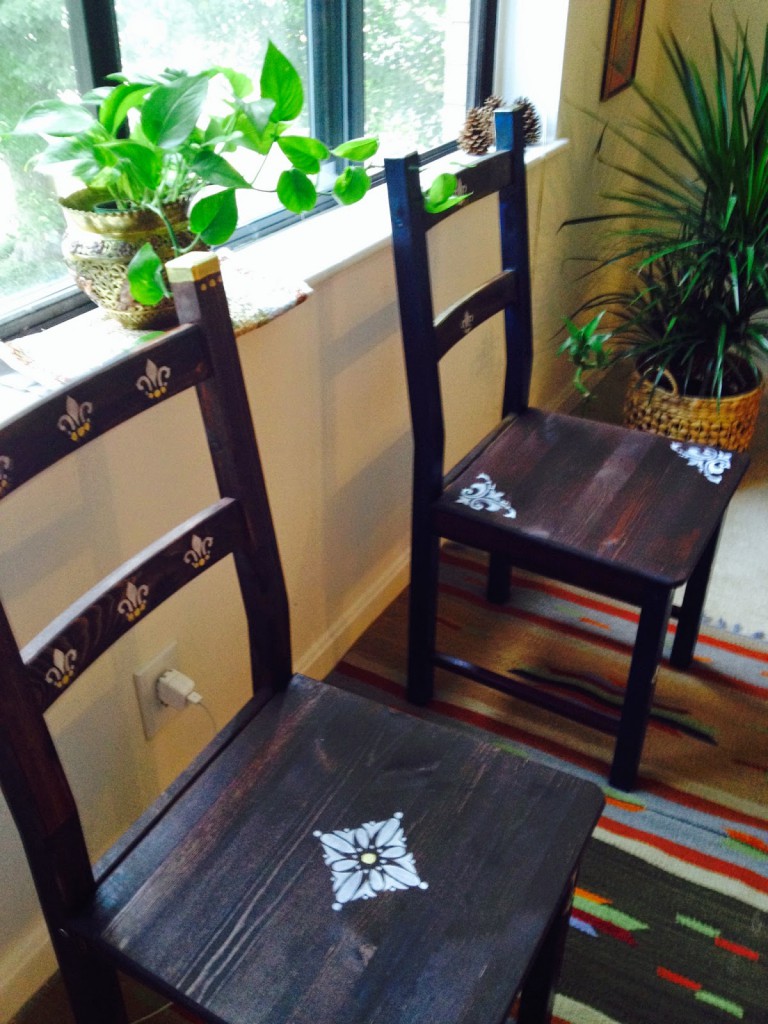
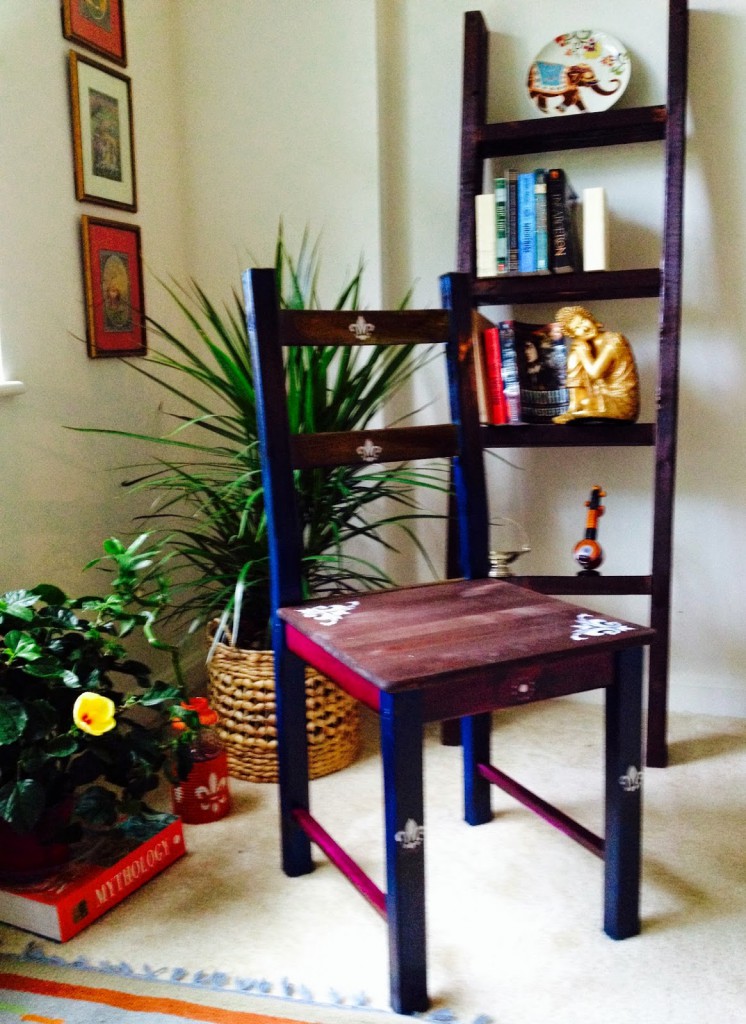
Throw a small colorful cushion to accentuate the details, or if you have an interesting backdrop like a vignette or a bookshelf (see the pics below), strategically place the chair in front of it.
You have your own custom made chair to enjoy!
All photographs belong to Sarmistha Ghosh. Please get in touch with The Keybunch in case you have questions for her.
——————————————–
Thanks Sarmistha! We loved having you over!
The Keybunch is looking for contributors to sections like lifestyle, travel, food and DIY. We look forward to hearing from you, if you are interested!


Wow, Looks like a fun project!
Rachana, yes Sarmistha has amazing talent. I just had to feature those chairs here when I saw them!
Rachana dear Thanks 🙂
Thank you so much Sharon….such words of encouragement and appreciations means a lot for me.You have put it all together so beautifully 🙂
Sarmistha, the pleasure is all mine! 🙂
Great transformation Sarmistha….they turned out beautiful.
Thank you , Nayana 🙂
Loved the transformation from plain wooden chairs to fantastic designer chairs, wow.
Thanks a lot for the appreciation Sulekha,..I am glad you liked it 🙂
looks amazing.
Thank you Pooja. A lot of Kudos goes to dear Sharon for putting up the post so beautifully and artistically.It makes the DIY look even better.Thanks again to everyone 🙂
Sarmishta, you did a wonderful job on those chairs..