I was quite delighted when Mariam Walter emailed me last month, with pictures of some really gorgeous decoupages done by her! She is on a mission to up-cycle with the help of this beautiful art form, and she wants to share it with all of you! So here she is, with a beautiful tutorial that will give your old trays and other pieces a new lease of life!
 |
| Decoupage artist Mariam Walter |
Decoupage Tutorial
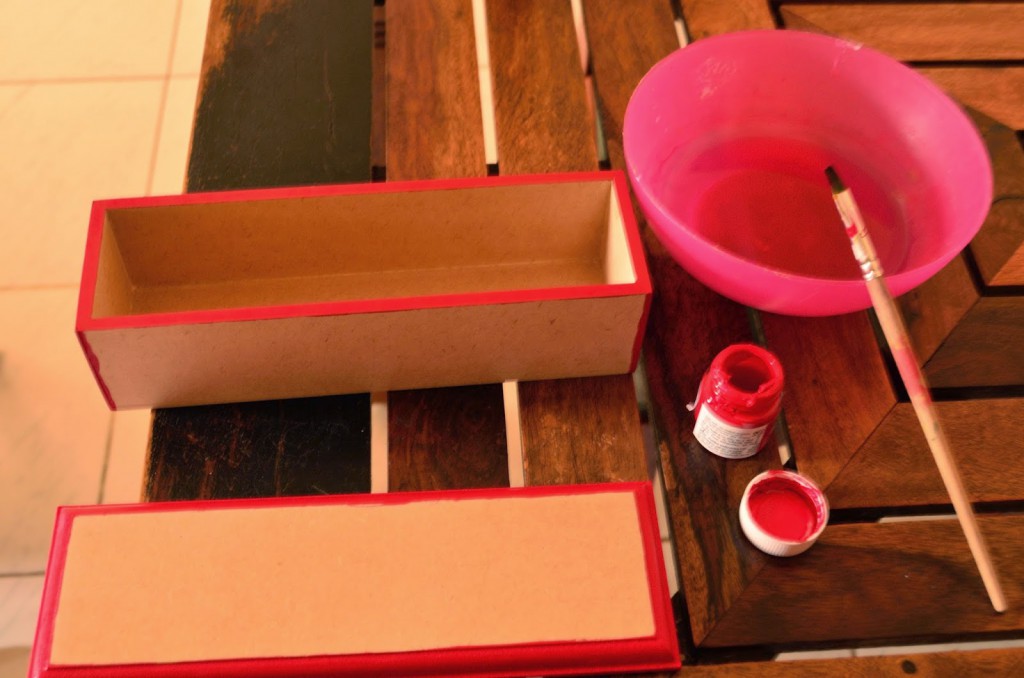
Items required
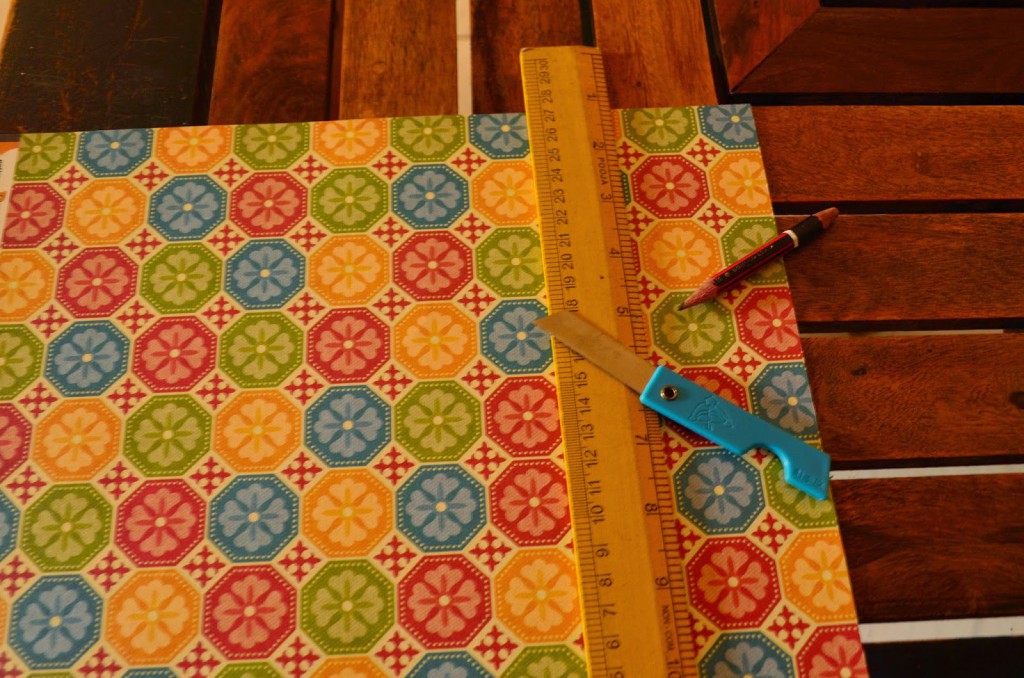
* Decoupage paper (you could also use photos, comic strips from newspapers, catalogs instead of decoupage paper)
* Mod Podge (a brand of modge podge or decoupaging glue available at shops such as Staples)
* Foam brush and flat brush
* MDF box (available at Craftslane) or use an old tray/ set of coasters
* sand paper *scissors/blade, *scale
* acrylic color (available at all stationery shops)
Method
- If you are using something old, ensure you first sand it to a smooth finish.
- Paint the box (or old tray) using the acrylic color of your choice (I have painted only the sides that will remain uncovered after decoupage). Let it dry. You could give a 2nd coat if required.
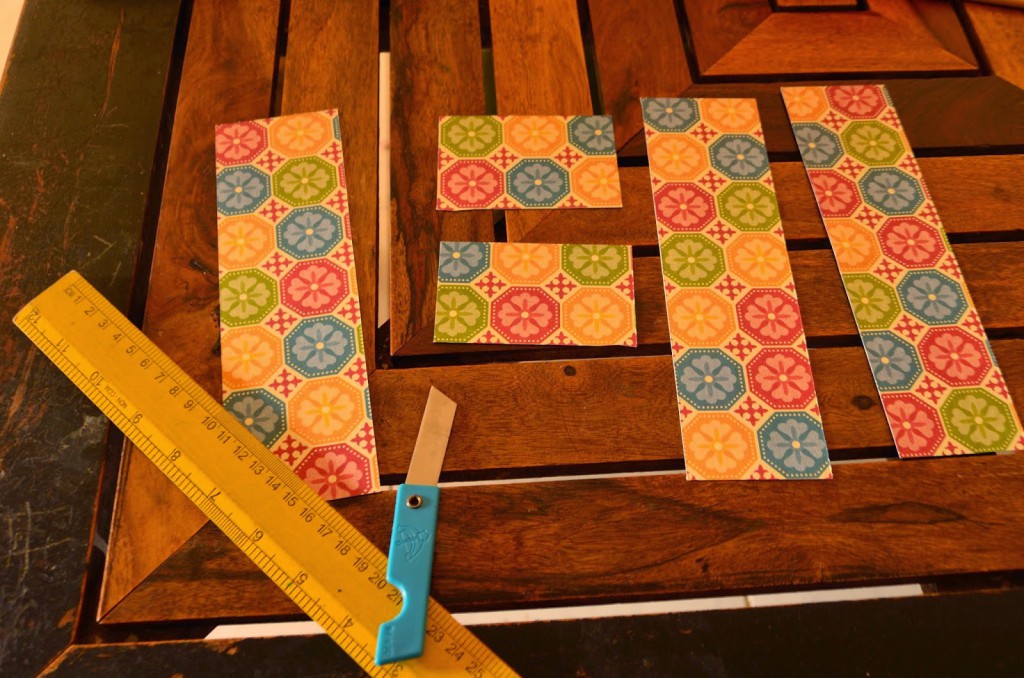
- Using a scale measure the sides of the box and use those measurements to cut out pieces of decoupage paper using a blade (preferably because using scissors gives ragged edges).
I have cut out 4 pieces for the sides and 1 for the top.
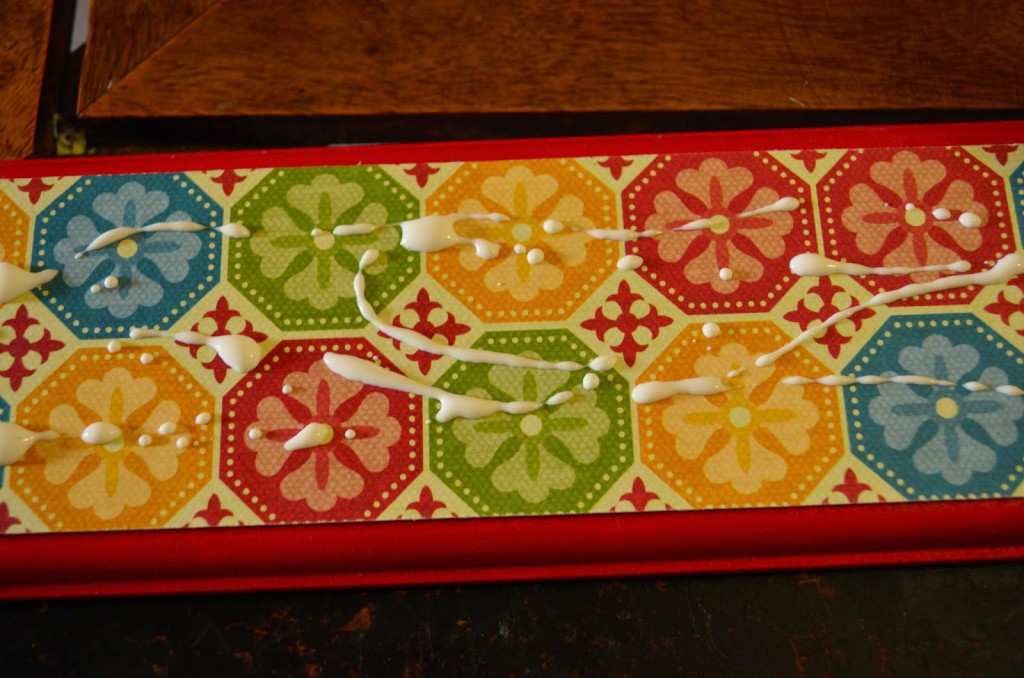
- Now apply Mod Podge evenly using a foam brush on the side of the box. (Keep a bowl of water and cloth handy to wash the brushes after use as Mod Podge dries off easily).
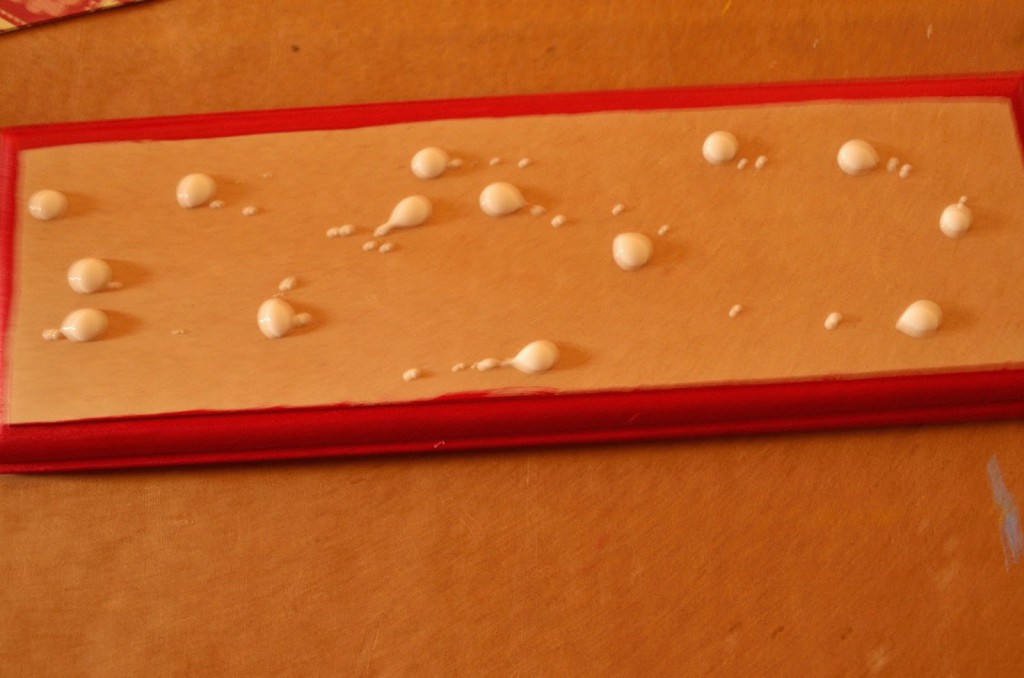

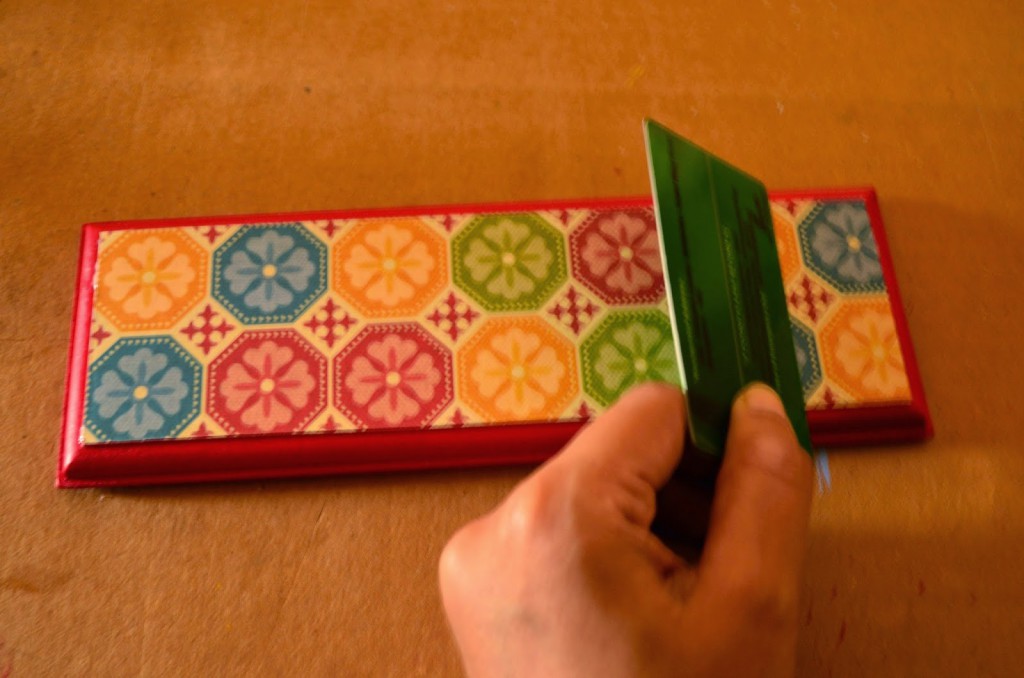
- Paste the paper and smooth it out, work from the center to the sides to make sure that there a no air bubbles trapped in (use a squeegee/old credit card to push out the bubbles ). Repeat the step for all the sides. Let it dry for 15-20 min.
- Use a sand paper to smooth out the edges of paper that are sticking out. Hope you are able to see the difference in the before and after pictures.
Before
After - Now apply Mod Podge on the entire box to seal it off. Let it dry. Apply more layers of Mod Podge as required. You are done!
Thank you Mariam for that wonderful tutorial! I loved the look of this box, and the colors used.
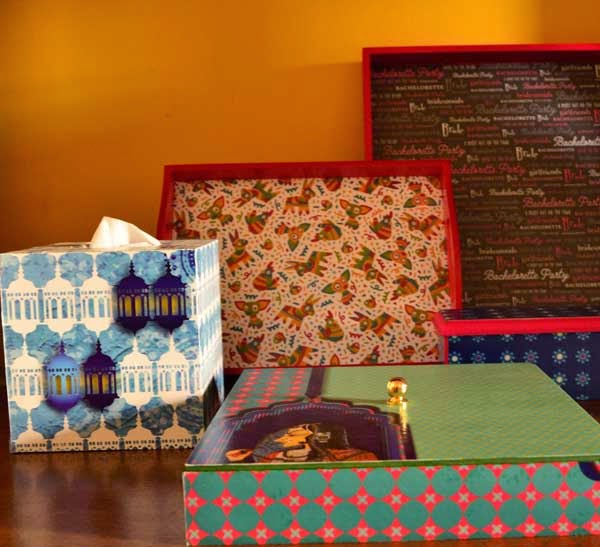
The idea is to upcycle so use this method and go crazy decoupaging whatever you want to revive! Here are some pictures of other decoupages done by Mariam.

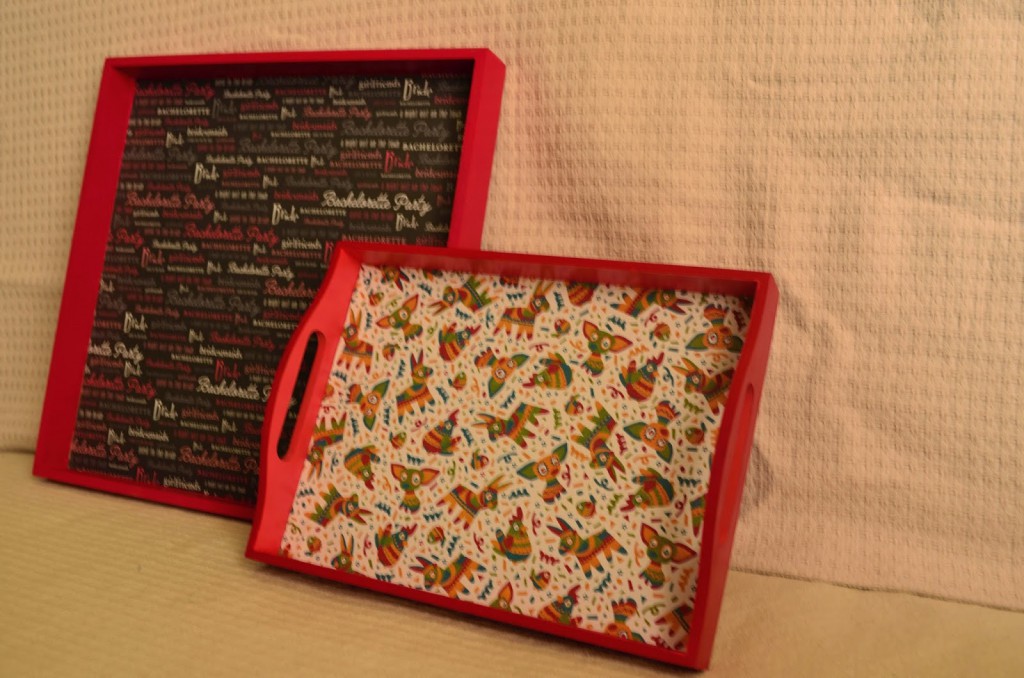
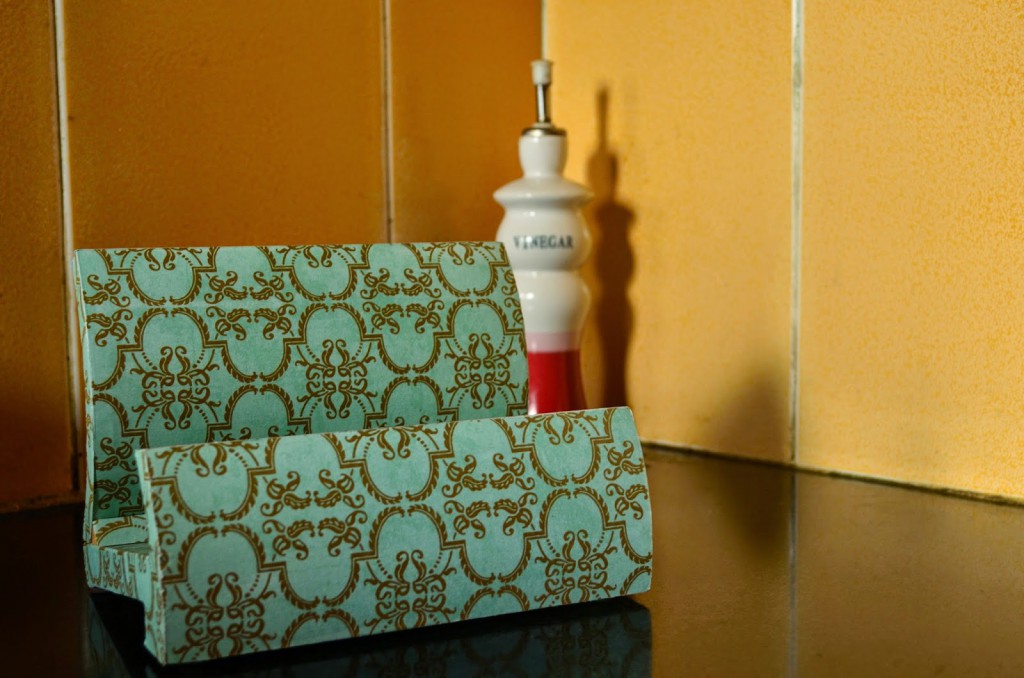
Aren’t they gorgeous? Want to pursue this art and learn more from Mariam? Email me and I will put you in touch with her.
Want to see more Decoupage stories on this blog, including one on how to decoupage a tissue box? Click here.
All images on this post belong to Mariam Walter. Do not re-publish, download or copy without her permission


Wonderful tutorial Mariam. Thanks Sharon for sharing it, I have been thinking to try my hand on this since ages. Really don't know when I will be able to do.
Disha, thanks! From experience I can tell you that you decoupage always leaves you feeling good because the results are fantastic! Do you want to be put in touch with Mariam?
Amazing Tutorial & very simple to understand.. 5 stars!!!!!
Alacritys
Great way to revive old things…nice toutorial, easy to understand. Thanks Mariam and Sharon.
I have conjointly spent several hours surfriding world wide web and I actually have found variety of machines however no overwhelming proof on the most effective product out there. Best Vacuum Sealer
TraditionalBest Vacuum Sealer do the vacant minimum of what's required for excellent sous vide cookery. They work by suck all the air out of a back then making AN air proof seal by melting the 2 sides of the bag along. the most important flinch is their inability to handle any liquids in any respect and inability to handle wet to varied degrees. If you're victimization the vacuum sealer for meat, you'll end up perpetually evacuation and laundry the liquid receptacle that has sucked out a number of the valuable juices from your food. If this receptacle becomes terribly wet, the machine may have to dry out for a handful days before operating once more.Best Vacuum Sealer
I use my Best Vacuum Sealerconstantly. I can buy meat at low prices in those huge packages, then come home and separate it into portions we will really use, without worrying about freezer burn. I use it to freeze berries in summer, so I can make jam in the winter, rather than during the worst of the heat.
Produce from my garden gets blanched, flash frozen, and then vacuum sealed. Likewise dried fruits and berries. I freeze soup in three cup portions in a low sided plastic dish, then knock the block of soup out of the container and vacuum seal it for long term storage
Thanks for sharing this salad recipe. I was looking for something like this.
vacuumsealersexpert.com